Showing posts with label PowerShell. Show all posts

Tuesday, May 22, 2018

How to monitor a log file in real-time

Recently I was working on a task where I had to monitor the log files from a ftp server. At one point I had to find out if a certain client had downloaded a file with a specific name, or look for entries from a client with a certain IP address.

One way to do this is opening the log file with a text editor and use the search function. Unfortunately this approach is not an easy way to detect updates, and the file has to be reopened every time the content gets changed. Luckily there are better ways to do this.

One of my all-time favorite tools is Baretail. This is a GUI alternative for the Unix program tail -f that allows you to read the last part (tail) of a file and follow (-f) updates in real-time. One of the many benefits it has to offer is color coding where you can easily highlight a line that contains a string that you may be interested in.

image

An alternative is the PowerShell command Get-Content with the -Wait switch, which gives the exact same result as tail -f. First of all this is a native PowerShell command so it works on systems where you can’t or won’t install 3rd party software. But more important, it’s PowerShell and thus extremely flexible and extensible.

One example that I used today is this: Get-Content .\fzs-2018-05-22.log -Wait | Select-String -Pattern '10.54.64.162'

image

Get-Content -Wait reads the content of the file and keeps doing so when new data gets added. Select-String accepts the objects from the pipeline and the -Pattern switch selects only the lines that match the specified pattern, in this case the IP address of a client that I’m interested in.

The best thing of course, is that the output is objects so you can do anything you want with it. Select, filter, trigger a work-flow are even color coding the output on the screen. Have fun!

Friday, February 23, 2018

Disable voicemail on a Skype meeting room accounts

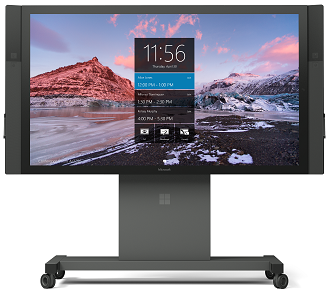
image of a Surface Hub

If you ever had to create user accounts for modern meeting room devices such as Microsoft’s Surface Hub or 3rd party devices such as the Polycom Trio 8800 you may have noticed that process is basically the same. Create a Room Mailbox with an enabled account and a password, then enable the account for Skype for Business with the Enable-CsMeetingRoom cmdlet.

Recently a coworker transferred a Skype call to a meeting room and when the person in the room wasn’t quick enough to respond, the call ended up in the conference room voicemail box. Understandably she requested us to disable voicemail on this account.

After investigation we found that Azure Voicemail was enabled when we added licenses for Office 365 Phone System and Calling Plan. Disabling voicemail is easy. Either sign-in with the username and password of the meeting room and visit the web based advanced settings: https://aka.ms/vmsettings. Then clear the checkbox for Activate Voicemail.

image

Alternatively an admin can disable the voicemail feature in Skype for Business Online PowerShell:

Set-CsMeetingRoom <SIP address> -HostedVoiceMail:$false

Reference:

Check Skype for Business voicemail and options

How to Set up and configure Cloud Voicemail for Skype for Business Online users

Monday, May 1, 2017

Exchange Remote PowerShell behind a proxy server

Today I ran into the following issue. I tried to open a Remote PowerShell session to Exchange Online but the module failed to load with the error message:

New-ExoPSSession : Create Powershell Session is failed using OAuth

image

Initially I suspected that the customer’s firewall performed some kind of traffic inspection or recognized and denied the traffic as a blocked ‘application’. I was able to browse the internet from this computer and after all Remote PowerShell is just https traffic.

However, the culprit was the proxy server. More specific, I configured a proxy server in the Internet Explorer settings but did not verify if Remote PowerShell observed the same connection settings. And the answer is no, the console does not use the IE settings but falls back to the winhttp configuration. In this environment the firewall configuration did not allow outbound traffic unless it passes through the proxy.

Telling PowerShell to use the proxy server is easy. Open an elevated prompt and use the following command to configure winhttp to use a proxy server and port:

netsh winhttp set proxy proxy.network.tld:8080

To import the settings that where configured in IE:

netsh winhttp import proxy source =ie

And important, to remove the proxy configuration for winhttp:

netsh winhttp reset proxy

image

Configuring the proxy for winhttp fixed my issue and I was able to connect to Exchange Online with PowerShell successfully.

image

Tuesday, April 11, 2017

Some feedback on the new Exchange PowerShell cmdlets

As someone who has been working pretty much dedicated with Exchange since ~2000 I have witnessed quite a few changes. The single most important one is the move to PowerShell as the primary management interface. The Exchange team was the first within Microsoft to switch for the full 100% to PowerShell and at least two version of Exchange have seen their release slightly delayed because they had to wait for the PowerShell version GA first.

While all other products continued to implement PowerShell as well and used the same set of professional standards there were significant differences to notice between the various implementations. I always preferred the way how the Exchange team implemented PowerShell. Identity is always positional parameter 1, Get cmdlets without a parameter return the first 1k of results or whatever is the default value of ResultSize for that cmdlet and destructive cmdlets (Set, Remove, New) always support the -WhatIf switch. I’m sure that every Exchange admin once tried to run Get-ADuser and discover that the cmdlet doesn’t return any values unless you specify a value for -Filter.

Personally I always preferred the consistent and user friendly implementation in Exchange. Maybe that’s why it bothers me that Microsoft no longer applies the same standard to new cmdlets that are being added in Exchange and Exchange Online.

An example is Get-FoucesedInbox and Set-FoucesedInbox:

image

The first example shows that the -Identity parameter no longer is a the first positional parameter, a positional parameter can be omitted and PowerShell assumes the first value after the cmdlet to be meant for the first positional parameter. This can be a bit annoying because Exchange admins are no longer used to specify the -Identity parameter because they never had to.

What’s more serious is that Set-FoucesedInbox no longer accepts the -WhatIf switch. -WhatIf tells the cmdlet to perform all prerequisite checks but not to make the actual changes. This parameter is essential for admins to check their syntax before running the actual cmdlet.

Some other examples of cmdlets that did not receive the -WhatIf switch are:

Cmdlet

Exchange

Exchange Online

Set-Clutter X X
Set-CompliancePolicySyncTenantInfo X X
Remove-BlockedSenderAddress   X
Remove-CompliancePolicySyncNotification X X
Set-OMEConfiguration   X
New-ReportSchedule   X
Set-ReportSchedule   X

As you may notice they were all added in the last few years.

While I understand that the industry has changed and Microsoft’s priorities are different in the ‘cloud first’ era, I do urge the Exchange Team to keep focus on what made them successful in the first place: excellent quality and always strive to deliver the best. Please do not forget to think of the people that are actually working with the product.

Thursday, March 16, 2017

New Exchange Online PowerShell module with MFA support no longer in Preview

In a previous article I wrote about the new PowerShell module with support for Modern Authentication and Multi-factor Authentication. The Preview status was a reason for many organizations to hesitate to take the new module into production.

Yesterday Microsoft released an updated version of the Hybrid Configuration Wizard with MFA support, the HCW now requires installation of the new PS module to support MFA. Microsoft’s ‘hybrid’ PM Timothy Heeney confirmed in the comments section that this also marks the official RTM of the new PowerShell module, the module is no longer in Preview. Good news!

Friday, January 20, 2017

Windows Management Framework (WMF) 5.1 Released, do not install on Exchange

Today the PowerShell team announced the release of version 5.1 of the Windows Management Framework, for most people better known as PowerShell 5.1. While Windows Server 2016 already contained WMF 5.1 when the product was released, the download released today allows administrator to install WMF 5.1 on older operating systems such as Windows Server 2008 R2, 2012 and 2012 R2.

This is a reminder that currently no version of Exchange Server supports a newer version of WMF than the version that was released with the operating system. As always when it comes to supportability questions, the Exchange Server Supportability Matrix is a valuable resource.

image

Strictly speaking the same limitation applies to a remote management computer too, but I am not aware of any issues with running a newer version of Remote PowerShell against Exchange on an operating system with an older version of WMF. But be aware of the supportability limitations around WMF and PowerShell.

Thanks Niklas, for pointing out that Server 2016 was released with WMF 5.1, not 5.0 as I wrote initially.

Wednesday, January 11, 2017

New Exchange PowerShell module with Modern Authentication support now available in Office 365 Portal

Many organizations are enabling multi-factor authentication (MFA) for all their accounts, or a subset such as for instance user accounts with an admin role. Especially with how easy this is with Office 365, even with the basic MFA feature that’s included with the license. Unfortunately enabling MFA on an admin account breaks the ability to use PowerShell to administer Exchange Online, Skype for Business Online or SharePoint.

A few months ago a new version of the Exchange PowerShell module was ‘leaked’ to the internet. It was a click-to-run executable without any documentation, but it introduced support for Modern Authentication which is a requirement for MFA.

And while there’s still no public announcement on the various Microsoft Exchange or Office blogs, not even a mention in the Office 365 Roadmap, there have been some recent updates. For starters the new PowerShell console is now available for download in the Hybrid section of the Exchange Admin Center.

image

The second is that some documentation has been published. The process was pretty self-explanatory but some official guidance is always better. The short version is this: install the application, then use Connect-EXOPSSession to create a remote session.

image

Read more in this article on the TechNet Exchange Technical Library.

Friday, November 4, 2016

Office 365 MFA is awesome! Unless you’re an administrator…

For some reason I have never worked with MFA with Office 365 until last year. And I must say, it is awesome! Even the free version of Azure MFA that’s included with the Office 365 subscription meets the requirements of most organizations. It’s very easy to setup and configure and the end-user experience is pretty good too, supporting text messages, phone call or the Azure Authenticator app.

image

Microsoft did a great job integrating the PhoneFactor acquisition (2012) in Azure AD and Office 365. So it’s not a surprise that a lot of organizations plan to enable MFA for all users, some users or the users with an admin role. And that’s where the issue is, Office 365 MFA currently does not support Remote PowerShell. Or I should say Remote PowerShell does not offer support for MFA because this would require support for Modern Authentication. This applies not only to Exchange management, but too PowerShell management of SharePoint, Skype for Business, EOP and Security & Compliance as well.

image

How about app passwords then? We can use app passwords for applications that do not support MFA right? Unfortunately app passwords are not working either.

When talking with Microsoft Premier Support they explained there’s currently no news to share. However, a Microsoft Most Valuable Professional explored the limits of his NDA on Facebook when he disclosed that Microsoft has made a preview version of Exchange PowerShell to beta testers at the moment. I’m very keen to learn more about this new version, because currently Remote PowerShell depends on the version of PowerShell that’s installed in the OS of the workstation. I’m assuming that MFA support requires the installation of additional software.

Ironically the new Office 365 Secure Score site (https://securescore.office.com/), a challenge were organizations receive points for increasing the security, awards 50 points for organizations that enable MFA for all their Tenant Admins. There’s no mention that this removes the ability to manage Office 365 with PowerShell.

image

Keep an eye on the Office 365 Roadmap and the Azure MFA Documentation for updates.

Friday, August 26, 2016

Update, fixed: KB3176934 breaks remote PowerShell

Update: This issue has been fixed in the re-released KB3176938 update.

Today I ran into an error message on one of my systems. PowerShell was unable to import my remote session to Exchange Online.

image

Import-PSSession : Could not load type 'System.Management.Automation.SecuritySupport' from assembly 'System.Management.Automation, Version=3.0.0.0, Culture=neutral, PublicKeyToken=31bf3856ad364e35'.

A quick Google search learned that this KB3176934 update was released a couple of days ago and is known to break DSC, remote PS and probably other stuff.

Microsoft scheduled an updated update to be released on the 30th of August 2016. If you can’t wait for some reason, for instance you planned to do some actual work today, uninstall the update and reboot your system.

wusa /uninstall /kb:3176934

Source: PowerShell DSC and implicit remoting broken in KB3176934

Thursday, February 25, 2016

PowerShell 5.0 re-released. Do not install on Exchange!

Two weeks ago Microsoft decided to offer the latest version of .Net Framework as a recommended update. Many Exchange admins found out the hard way that it’s not wise to install every single update without checking if it is actually supported to run them in combination with Exchange. In case of .Net Framework 4.6.1 there were in fact known issues, as some people soon discovered.

Today Microsoft re-released Windows Management Framework (WMF) 5.0 RTM. WMF included PowerShell 5.0 which brings many new features. Advanced administrators are probably looking forward to install WMF 5.0 on all their systems as soon as possible. But don’t do that, not before you’re absolutely sure that it is supported with Exchange.

This information can be found in the Exchange Server Supportability Matrix, one of the most important Exchange resources that’s often overlooked. In the ESSM we find for instance that .Net Framework 4.6 is not supported:

image

And the same applies to WMF 5.0:

image

And for customers with Outlook 2007 who consider Exchange 2016:

image

By the way, it’s perfectly fine to use PowerShell (WMF) 5.0 to connect to Exchange Online. In fact, if you’re on the November update of Windows 10 (Version 1511) this means that PowerShell 5.0 is already installed on your system.

Wednesday, July 22, 2015

PowerShell one-liner: How to query certificates in the certificate store?

PowerShell uses providers and drives to provide a consistent way to work with items in the file system, Active Directory, the registry, in applications and even the certificate store.

image

Recently I started using PowerShell to find the thumbprint of an installed certificate, for instance when I need that value to enable a certificate for Exchange services. To do this we can use the Cert: drive, navigate to the Local Computer store and then query the items in My, this is the Personal container you’re probably familiar with from working with the Certificates MMC snap-in.

dir cert:\localmachine\my

Where dir is of course an alias for Get-ChildItem.

Wednesday, March 4, 2015

PowerShell one-liner: How to find the AD site name?

How can we query the AD site name of a server with PowerShell? One way to do this is through the .NET ActiveDirectorySite Class:

[System.DirectoryServices.ActiveDirectory.ActiveDirectorySite]::GetComputerSite().Name

An alterative approach is to query the value for the DynamicSiteName registry key under HKLM:\SYSTEM\CurrentControlSet\services\Netlogon\Parameters.

(Get-ItemProperty "HKLM:\System\CurrentControlSet\Services\Netlogon\parameters").DynamicSiteName

image

Thursday, February 19, 2015

PowerShell one-liner: Add a computer to a domain or workgroup

Today I ran into an issue where I needed to remove some servers from the domain, perform some tasks and add them again. Adding a server to the domain is very common, use the Add-Computer cmdlet like this:

Add-Computer -DomainName MyDomain.tld

Or even this to change the computer name in the process:

Add-Computer -DomainName MyDomain.tld -NewName server34

To remove a computer from the domain and add it to a workgroup we can use the Remove-Computer cmdlet:

Remove-Computer -Workgroup temp

Or maybe:

Remove-Computer -Workgroup temp -Force -Restart

Makes sense, doesn't it? Don't forget to use an elevated prompt (Run as Administrator) or all you will see is an Access Denied error.

Thursday, February 5, 2015

PowerShell one-liner: Start a service on a remote server

A while back I wrote an article on how to start a service on a remote computer. Because Start-Service does not have a -ComputerName parameter I suggested this alternative approach:

(Get-WmiObject -Computer server1 Win32_Service -Filter "Name='msExchangePOP3'").InvokeMethod("StartService",$null)

While this works perfectly, the syntax is a bit hard to remember. Gladly I became aware of a much simpler way to do this. While we can't use Start-Service, we can use Set-Service to set the service to the Running status.

Set-Service msExchangePOP3 -Status running –ComputerName server1

That's cool, isn't it? So for instance when you're in the process of enabling IMAP on an Exchange 2013 server, your script could be something like this:

Set-Service msExchangeIMAP4 -StartupType Automatic –ComputerName server1
Set-Service msExchangeIMAP4 -Status Running –ComputerName server1
Set-Service msExchangeIMAP4BE -StartupType Automatic  –ComputerName server1
Set-Service msExchangeIMAP4BE -Status Running –ComputerName server1

PowerShell one-liner: Reboot a remote server

To reboot a remote server we can use the Restart-Computer cmdlet, use the -ComputerName parameter to tell PowerShell to execute the command against a remote server. To restart server Host01:

Restart-Computer -ComputerName host01

Just like rebooting a local server PowerShell will fail if another user is still logged on to the server. Add the -Force parameter to force the reboot.

image

Thursday, December 4, 2014

Autodiscover testen met Outlook

Outlook die zijn eigen profiel configureert zonder dat de gebruiker hier iets aan hoeft te doen, en het werkt ook voor ActiveSync! Het kan sinds Exchange 2007 en Outlook 2007, maar Autodiscover heeft van het begin af voor verwarring gezorgd. In dit artikel ga ik niet in over de exacte werking maar laat ik een 'client-side' troubleshooting tool zien die ons zowel de werking van het proces laat zien, als de daadwerkelijke informatie die de client van de Autodiscover Service krijgt.

Je hebt nodig:

  • Outlook 2007 of hoger
  • Een Outlook profiel

Dat Outlook profiel mag een leeg profiel zijn of eentje met nepgegevens, bijvoorbeeld voor POP3 en SMTP.

Zoek het Outlook icoontje in de System Tray, klik er met de rechtermuisknop op terwijl je CRTL ingedrukt houdt. Kies nu Test E-mail AutoConfiguration:

image

Wanneer je als AD gebruiker op een AD member computer ingelogd bent leest Outlook het windowsEmailAddress attribuut uit en vult deze alvast in. In alle andere gevallen vul je je mailadres en wachtwoord in. Haal de vinkjes voor Guessmart weg.

image

Klik nu op Test, waarna Outlook een Autodiscover lookup gaat doen met de hierboven ingevulde gegevens. Afhankelijk van de configuratie kan dit even duren, het is dan ook interessant om tijdens het uitvoeren direct het tabblad Log in de gaten te houden, hier kunnen we de voortgang van het proces volgen:

image

In dit geval gaat het om een Office 365 mailbox waarbij het proces wat complexer is, maar het belangrijkste is dat de laatste regels aangeven dat het proces geslaagd is. Bij een ander resultaat betekent dit dat je de stappen doorleest en na gaat of ze overeenkomen met de wijze waarop je Autodiscover geconfigureerd hebt.

Dan terug naar het tabblad Results, deze geeft het ontvangen resultaat netjes weer maar bevat feitelijk dezelfde informatie als de ruwe XML die we op het derde tabblad kunnen zien.

image

Op deze plek controleren we de daadwerkelijk ontvangen informatie, grotendeels bepaald door wat we als InternalURL en ExternalURL waardes hebben geconfigureerd in Exchange.

Met dit handige hulpmiddel wordt het troubleshooten van Autodiscover een stuk eenvoudiger.

Wednesday, July 16, 2014

PowerShell Oneliner: Wanneer was de laatste backup van de Exchange mailbox databases?

Vraag de mailbox databases op met de -Status parameter, anders zijn properties als LastFullBackup leeg. Sorteer deze in omgekeerde volgorde en geef ze weer in een tabel:

Get-MailboxDatabase -Status | sort lastfullbackup -Descending | ft name,lastfullbackup

Wednesday, June 11, 2014

Het mailbox type aanpassen in Exchange en Office 365

In Exchange 2003 kenden we eigenlijk maar één type mailbox. Toch worden mailboxen heel verschillend gebruikt, door één persoon of meerdere, om mail of contacten op te slaan of juist om iets te reserveren. Tegenwoordig kennen we een aantal soorten mailboxen, bijvoorbeeld Shared, Room, Equipment of de gewone User mailbox.

In Office 365 heeft een Shared mailbox nog een voordeel, je hoeft hier namelijk geen licentie voor aan te schaffen. Dit heeft ook een aantal beperkingen, zo is deze beperkt tot 10 GB grootte en kun je er niet mee aanmelden, dat betekent dus ook dat je hem niet kunt benaderen met Exchange ActiveSync.

Om die redenen wil je soms een mailbox omzetten van het ene naar het andere type. Dat kan gelukkig eenvoudig met het Set-Mailbox cmdlet. Bijvoorbeeld:

Set-Mailbox GedeeldeMailbox -Type Regular

Hiermee hebben we een mailbox omgezet naar een normale mailbox. Andere geldige waardes voor -Type zijn Room, Equipment en Shared.

Meer informatie:

Exchange 2013 Recipients
Set-Mailbox

Monday, May 19, 2014

Veel data in PowerShell? Stop het in een variabele

Even een handigheidje uit de praktijk. In Exchange of Exchange Online vraag je soms lijsten op van alle mailboxen, Public Folders of andere objecten. Afhankelijk van het aantal items en de performance van je omgeving kan het ruimte tijd duren om deze op te vragen. Als je deze data vervolgens meerdere keren wilt gebruiken om bijvoorbeeld statistieken op te vragen of een script voor te bereiden dan is het heel irritant om het commando een tweede keer uit te moeten voeren en vervolgens weer te zitten wachten.

Dan is het hand om de output direct de eerste keer in een variabele op te slaan. Vergelijk:

Get-PublicFolder \ -Recurse -ResultSize Unlimited | measure

En deze:

$pub = Get-PublicFolder \ -Recurse -ResultSize Unlimited
$pub | measure

Beide methoden geven je het aantal Public Folders in de hiërarchie, maar met de tweede optie kun je de $pub variabele nog een keer opvragen en de informatie sorteren, exporteren of doorvoeren naar een ander cmdlet zonder dat de Get-PublicFolder opnieuw uitgevoerd hoeft te worden. Dat scheelt tijd!

Monday, April 28, 2014

The term 'telnet' is not recognized as the name of a cmdlet

Telnet is de ideale tool waarmee je snel kunt testen of je ergens mail kunt afleveren en of de firewallconfiguratie een bepaalde TCP connectie toestaat. Maar er zijn natuurlijk nog veel meer situaties waarbij je Telnet zou willen gebruiken. Helaas staat Telnet sinds Windows Server 2008 standaard niet meer geïnstalleerd op de servers, het is nu een Windows Feature geworden die je zelf moet installeren.

image

Als je dit vergeet dan krijg je een melding als deze:

telnet : The term 'telnet' is not recognized as the name of a cmdlet, function, script file, or operable program. Check the spelling of the name, or if a path was included, verify that the path is correct and try again.

Gelukkig kun je Telnet eenvoudig installeren met het Add-WindowsFeature cmdlet:

Add-WindowsFeature telnet-client

Wanneer je nu de prerequisits voor Exchange op een server installeert volgens de beschrijving op deze pagina: Exchange 2013 Prerequisites, maak er dan een gewoonte van om Telnet-Client aan de lijst toe te voegen. Zo grijp je nooit mis wanneer je Telnet nodig hebt.

Extra tip: Hetzelfde geldt natuurlijk voor de AD management tools als ADSIEdit en Active Directory Users and Computers. Voeg hiervoor RSAT-ADDS toe aan de lijst met te installeren Windows Features als je deze graag op al je servers beschikbaar hebt.